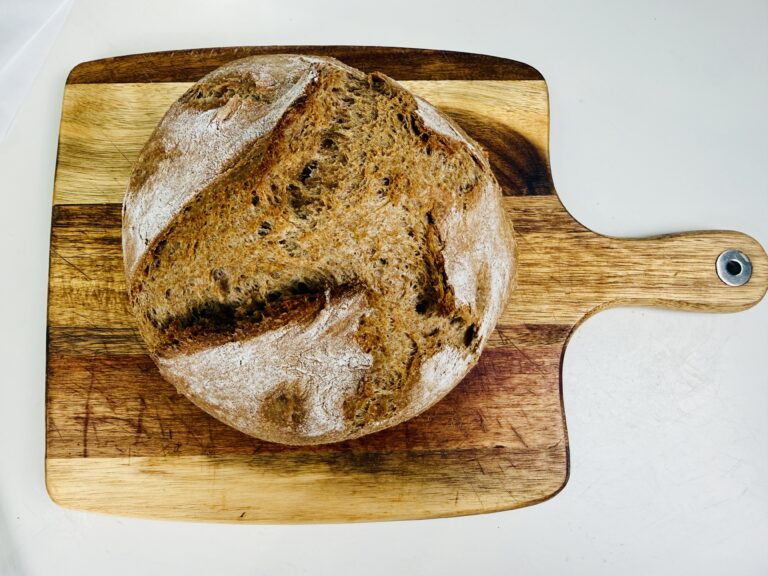
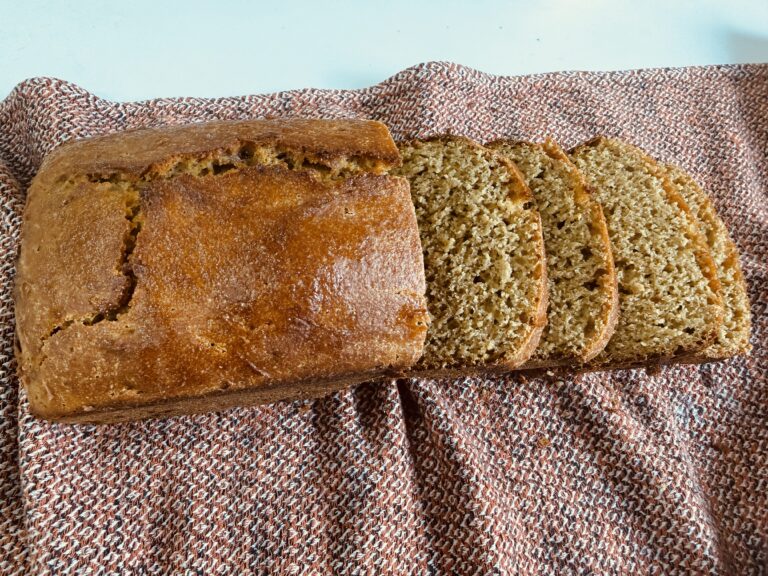
Homemade Chocolate Sandwich Bread

Soft Chocolate Sandwich Bread (Fresh Milled Flour, Yeast)
If you’ve been looking for a way to get your family excited about fresh milled flour, this is it. This soft chocolate sandwich bread is lightly sweet, packed with mini chocolate chips, and made entirely with fresh milled hard white wheat flour. It’s a yeast bread that’s perfect for sandwiches, toast, or eating warm straight from the oven.
The texture is soft and pillowy nothing like the dense whole wheat bread you might be picturing. Fresh milling your flour makes all the difference in flavor and nutrition, and the cocoa and chocolate chips make this loaf disappear fast.
Why Fresh Milled Flour Works So Well in This Bread
Fresh milled hard white wheat has a milder, sweeter flavor than store-bought whole wheat flour. That’s what makes it perfect for chocolate bread it complements the cocoa and honey without any bitterness.
The key is **hydration**. Fresh milled flour absorbs water differently than commercial flour, which is why this recipe includes a 10-minute rest after mixing. This lets the flour fully hydrate before you start kneading, and it’s the reason you get a soft loaf instead of a dry, crumbly one.
If you’re new to fresh milled flour baking, this is one of the most forgiving recipes to start with. The cocoa and chocolate chips are very forgiving with color and texture even if your loaf isn’t picture-perfect, it will taste amazing.
Ingredient Notes
– **Fresh milled hard white wheat flour:** This is the best wheat variety for this bread. Hard white wheat has a mild, slightly sweet flavor that pairs perfectly with chocolate. If you don’t have a grain mill yet, you can substitute store-bought whole wheat flour, but the flavor, nutrition, and texture won’t be the same.
– **Cocoa powder:** Use unsweetened natural cocoa powder (not Dutch-processed). A single tablespoon gives a subtle chocolate flavor and a beautiful brown color without making the bread bitter.
– **Honey:** Honey feeds the yeast and adds natural sweetness. You can substitute maple syrup in equal amounts.
– **Oil:** Either olive oil or avocado oil works. The oil keeps the crumb soft and the bread moist for days.
– **Mini chocolate chips:** Mini chips distribute more evenly than standard-sized chips. You’ll get chocolate in every bite.
How to Make Soft Chocolate Sandwich Bread
Step 1: Mix the Wet Ingredients
In a large mixing bowl, combine the warm water (105–110°F), honey, oil, egg, vanilla extract, and brown sugar. Whisk until everything is smooth and the honey is fully dissolved.
The water temperature matters too hot and you’ll kill the yeast, too cool and the yeast won’t activate. You can use a kitchen thermometer if you have one.
Step 2: Add the Dry Ingredients
Add about 3 cups of fresh milled hard white wheat flour, the cocoa powder, salt, and active dry yeast. Mix until a shaggy dough forms. Don’t worry about it looking rough at this stage that’s exactly what you want.
Step 3: Rest the Dough (Autolyse)
Let the dough rest for **10 minutes**. Do not skip this step. Fresh milled flour needs time to fully absorb the water. This short rest makes the dough much easier to knead and results in a softer finished bread.
Step 4: Knead the Dough
Knead for 8–10 minutes by hand, or 6–7 minutes in a stand mixer with a dough hook. During this process, **add the remaining flour about 1/2 cup at a time** until the dough is smooth and slightly tacky but not sticky.
I used my KitchenAid mixer and it took about 25 minutes total, adding about 2 more cups of flour during the process. Every flour is slightly different, so go by feel rather than exact measurements.
**How to know when it’s done:** The dough should be smooth, pull away from the sides of the bowl, and spring back when you poke it.
Step 5: Add the Chocolate Chips
Flatten the dough slightly on your work surface. Sprinkle the mini chocolate chips over the top and knead them in briefly until they’re evenly distributed throughout the dough. This only takes about 1–2 minutes.
Step 6: First Rise (Bulk Fermentation)
Place the dough in a lightly greased bowl. Cover with a damp towel, shower cap, or plastic wrap. Let it rise for **60–75 minutes** at room temperature until the dough has doubled in size.
Step 7: Shape the Loaf
Gently deflate the dough and shape it into a loaf. Place it seam-side down in a greased standard loaf pan (9×5 inches).
Step 8: Second Rise (Proofing)
Cover the pan and let the dough rise for **30–45 minutes** until it’s about 1 inch above the rim of the loaf pan. Don’t let it over-proof if the dough rises too far above the pan, it may collapse in the oven.
Step 9: Bake
Preheat your oven to **350°F (175°C)**. Bake for **30–35 minutes** until the top is firm and the bread sounds hollow when you tap it.
For best results, check the internal temperature with a thermometer the bread is done when it reaches **190–195°F** in the center.
Step 10: Cool
Let the bread cool in the pan for **10 minutes**, then remove it from the pan and transfer to a wire rack. Let it cool for at least **30 minutes** before slicing.
I know it’s hard to wait but slicing too early will compress the crumb and make the bread gummy. Trust the process.
Tips for the Best Results
– **Weigh your flour.** Fresh milled flour can vary a lot by volume depending on how coarsely you mill it. Using a kitchen scale gives you the most consistent results.
– **Don’t add all the flour at once.** Start with 3 cups and add more gradually during kneading. You may need more or less depending on your flour and humidity. I ended up adding an additional 2 cups.
– **Watch the dough, not the clock.** Rise times are estimates. In a warm kitchen, the dough may rise faster. In a cool kitchen, it may take longer. Look for the dough to double in size.
– **Use a loaf pan you trust.** A standard 9×5-inch pan works best. If your pan is smaller, the bread will mushroom over the top. If it’s larger, the loaf will be shorter and wider. I love my CAST IRON pans. They don’t have any yucky coatings on them and my bread cooks evenly and doesn’t burn on the bottoms.
How to Store Chocolate Sandwich Bread
– **Room temperature:** Store in a beeswax bread bag or airtight container for up to 3–4 days. The chocolate chips help keep the bread moist.
– **Freezer:** Slice the bread first, then freeze in a single layer on a baking sheet until solid. Transfer to a freezer-safe bag. Store for up to 3 months. Toast individual slices straight from the freezer.
🛒 TOOLS I USE IN MY KITCHEN:
🔥 Dutch Oven, safe for 500 degrees, essential for that crackly crust:
🍞 Cast Iron Loaf Pan, I bought two, one goes on top of the bread:
⚖️ Kitchen Scale, strongly recommended for accurate baking:
My FAVORITE Banneton Baskets:
https://amzn.to/4viDhks Oval
https://amzn.to/3SOvBc9 ROUND
BLUE Large Spatula: https://amzn.to/44XYBAP
BLACK Large Spatula: https://amzn.to/4h3HCEA
🌡️ Instant Read Kitchen Thermometer, takes the guesswork out:
🥣 Danish Dough Whisk, the best tool for mixing sourdough:
🟢 Lime Green Bowl Scraper, my favorite dough tool:
https://amzn.to/46oJcef
🩶 Stainless Steel Bench Scraper, cut dough and clean countertops
https://amzn.to/4r0rm8P
🧂Redmond Real Salt: with MINERALS!
🥄 Spurtle, perfect for stirring and scooping sourdough starter:
🧤 Oven Mittens, for that HOT HOT Dutch oven:
https://amzn.to/4eI1VVa oven mitts
https://amzn.to/4eTiX2L with fingers
🚿 Shower Cap, my personal favorite way to cover dough:
🍯 Beeswax Bread Bag, for storing your finished loaf naturally:https://amzn.to/4oYEaNA
🌟 Cute Star Shapes, optional but so fun:
🧺 Super Pretty Tea Towel, for covering your dough beautifully:
https://amzn.to/3R5vh8l
⏲️ My visual timer:
https://amzn.to/4t0MMUH
Bosch Universal Mixer: https://amzn.to/4bH3YIq
Kitchen Aid Mixer: https://amzn.to/4w3s9cp
📌 DISCLAIMER: As an Amazon Associate, I earn from qualifying purchases. I only share tools I personally use and love.
🔔 New videos every week! Subscribe so you never miss a recipe: https://www.youtube.com/@freshflourliving
Frequently Asked Questions
Can I use store-bought whole wheat flour instead of fresh milled?
Yes, but the results will be different. Store-bought whole wheat flour has a stronger, more bitter flavor and has lost some of its natural oils and nutrients during processing. Fresh milled hard white wheat produces a milder, sweeter bread with better texture. If this is your first time, I’d encourage you to try it with fresh milled flour you’ll taste the difference.
Can I make this without a grain mill?
Yes you can use store-bought whole wheat flour as a substitute. The texture and flavor won’t be identical, but you’ll still get a delicious chocolate bread. If you’re interested in getting started with fresh milling, I use the Wondermill grain mill and love it.
Why does my fresh milled flour need to rest before kneading?
Fresh milled flour has the full bran, germ, and endosperm intact. The bran is sharp and needs time to soften and absorb water. Without the rest, the bran can cut through gluten strands and give you a denser, tougher bread. Ten minutes of rest solves this.
Can I use Dutch-processed cocoa powder?
I recommend natural unsweetened cocoa powder for this recipe. Dutch-processed cocoa has been treated with an alkalizing agent that changes its acidity, which can slightly affect how the dough rises. Natural cocoa works perfectly here.
Can I add more cocoa powder for a darker chocolate flavor?
You can increase the cocoa to 2 tablespoons, but I wouldn’t go beyond that. Too much cocoa can dry out the dough and make the bread bitter. If you want more chocolate flavor, increase the chocolate chips to 1 cup instead.
Is this bread healthy?
This bread is made with 100% whole grain fresh milled flour, which means you’re getting the full nutritional benefit of the wheat berry fiber, B vitamins, iron, and healthy fats from the germ. The honey and chocolate chips add sweetness, but there’s no refined flour or artificial preservatives. It’s a treat that you can feel good about.
Can I use this for sandwiches?
Absolutely — that’s what it’s designed for. The bread slices cleanly once fully cooled and holds up well with peanut butter, Nutella, cream cheese, or even savory fillings. It also makes incredible toast and French toast.
Watch the Full Video
I walk through this entire recipe step by step in my video, including how I mill the flour and exactly what the dough should look like at every stage. Watch it here:
If you’re new to fresh milled flour baking, I also have a beginner-friendly sourdough tutorial that walks you through the basics.
More Fresh Milled Flour Recipes
Looking for more ways to use your grain mill? Check out these recipes:
All my fresh milled flour recipes ~ HAPPY BAKING ~ Ashley 💛🍞

Soft Chocolate Sandwich Bread (Fresh Milled Flour)
Ingredients
Method
- Mix wet ingredients: In a bowl combine warm water, honey, oil, egg, vanilla, and brown sugar. Whisk until smooth.
- Add dry ingredients: Add flour, cocoa powder, salt, and yeast. Mix until a shaggy dough forms. 3. Rest the dough: Let the dough rest for 10 minutes so the fresh■milled flour can fully hydrate.
- Knead: Knead 8–10 minutes by hand (or 6–7 minutes in a mixer) until the dough is smooth and slightly tacky. My Kitchenaid mixer took about 25 minutes. Oh! During this process I added 2 more cups of flour , ½ cup at a time. You can see the video here
- Add chocolate chips: Flatten dough slightly and knead the chips in briefly until evenly distributed. 6. First rise: Place dough in a lightly greased bowl. Cover and let rise 60–75 minutes until doubled. 7. Shape: Shape into a loaf and place in a greased loaf pan.
- Second rise: Let rise 30–45 minutes until the dough is about 1 inch above the pan. 9. Bake: Bake at 350°F (175°C) for 30–35 minutes.
- Doneness: Bread should reach an internal temperature of about 190–195°F. 11. Cool: Let cool in the pan 10 minutes, then remove and cool at least 30 minutes before slicing.